Allocate Donations
How to allocate donations to the annual report(s) the funding was used towards.
1. Locate the unallocated donations
Find the donation on your to-do page. It lists the donor's name, amount, funded program, and received date.
2. Click `allocate`
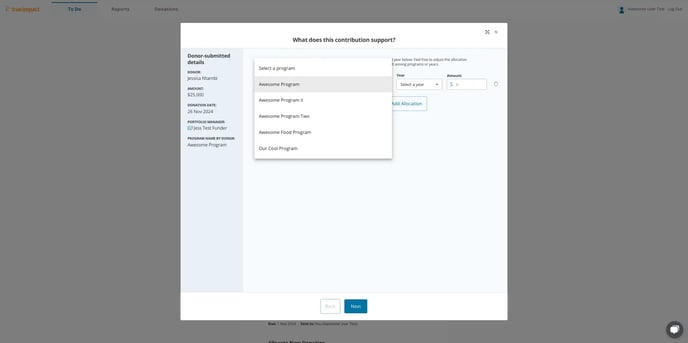
A pop-up window will appear, showing donation details. The system may pre-select a program. If not, you will select an existing program or create a new program that the funding is being used towards.

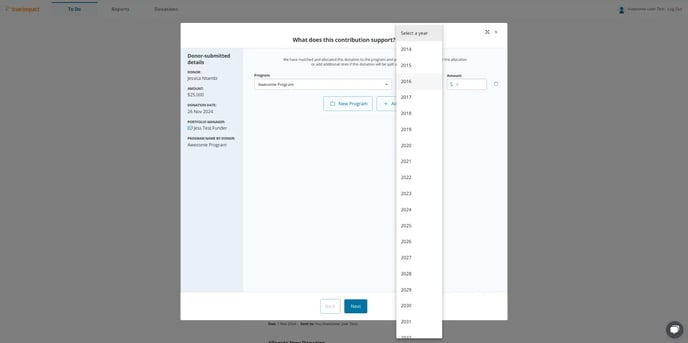
3. Select the program year
Choose the year the funds were or will be used towards. This might differ from the received date. If your program period spans two years, such as an academic year, select the year the program begins in. (Example: A report spanning Sept., 2024 - August, 2025 will select 2024).

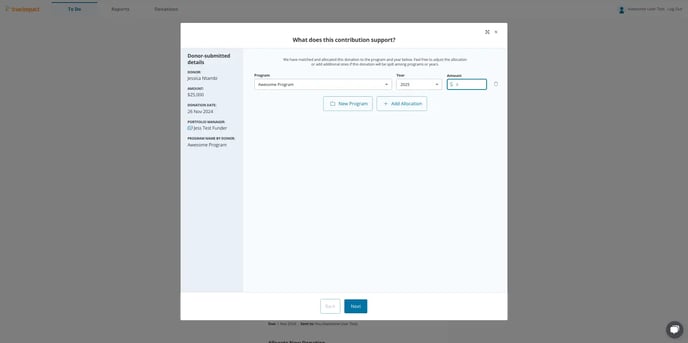
4. Allocate the amount
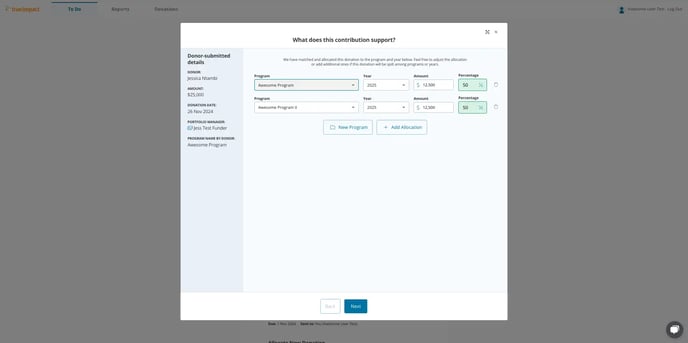
Enter the donation amount in the "Amount" text box. This will be the total donation amount if only allocating to one report. If allocating to multiple reports, ensure your total adds up to the full donation amount.

If the funding was used across multiple programs, enter the amount for the first program. Then, click "Add Allocation". Select the next program and year, and enter the allocated amount. Repeat as needed.

5. Add a new program (if necessary)
If the program the funding was used towards is not listed, click "New Program". Enter the program name in the textbox. Select the reporting manager from the dropdown (the person who will be the main point of contact for this report).
Tip: Click "Show all active programs" to avoid creating duplicate programs.
6. Review and confirm allocation
Ensure the allocation information looks correct and then click "Next".
7. Define the contribution purpose
Select the purpose of the contribution. Choose one of the following options:
- Ongoing Support: For general operational support.
- Upgrade of existing program: For improvements, staffing increases, or capacity expansion.
8. Determine contribution significance
Specify the contribution's importance:
- Essential to Program Existence/Total Funding: Select this option if the contribution is the program's sole funding.
- Significant/Attracted Additional Funding: Select either the second or third option if the contribution was crucial or leveraged other funding. This allows donors to claim 100% of outcomes.
- Regular but Important Contribution: Select this option if it's one of several contributions or the program would happen regardless of this donors contribution. The donor claims a percentage of outcomes based on how much they funded.
9. Finalize allocation
Click "Next". A confirmation message will appear. Click "Go to this report" to start working on it.